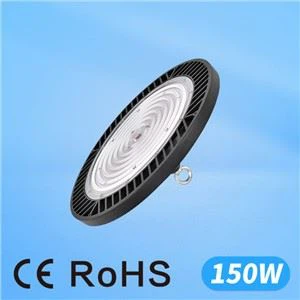
Shadows from LED lights almost always trace back to the lighting layout, not the LEDs themselves. When fixtures sit too far apart, are aimed poorly, or are fighting against racks and walls, their beams stop overlapping. You end up with bright pools directly under each fixture and darker gaps and dark spots in between. The answer is rarely a brighter bulb. To avoid shadows and dark spots with LED lights, you need the right combination of fixture spacing, beam angle, mounting height, light distribution, and a layout that accounts for the shelving, machinery, poles, and work surfaces that are actually in the room.
Whether you are lighting a warehouse, parking lot, office, retail floor, gym, or production facility, the goal is the same: even, overlapping illumination on the surface that matters, not just a high number on a spec sheet. Brighter output on its own often makes the contrast worse, leaving harsh hot spots surrounded by dim areas.

Why Do LED Lights Create Shadows and Dark Spots?
LEDs do not inherently throw more shadows than older lighting. Shadows appear whenever light is blocked, unevenly distributed, or concentrated too tightly in one spot. In commercial projects, the cause is usually one or more of the following:
- Fixtures are spaced too far apart for their beam spread.
- The beam angle is too narrow for the mounting height.
- Too few fixtures are trying to cover a large area.
- Racks, machines, poles, walls, or structural beams block the light.
- The layout was planned around the room, not around the task area.
- A different fixture was installed than the one used in the design.
One detail makes layout especially important with LED: LEDs are directional sources, emitting light in a defined direction rather than in every direction like older lamps. That makes them efficient, but it also means the optic and placement decide where the light lands. Get either wrong and you create the uneven brightness, dim corners, and patchy aisles that read as shadows.
The Fastest Way to Avoid LED Shadows: Design for Uniformity First
The quickest path to a shadow-free space is to design for uniformity before anything is installed. That means choosing fixtures that suit the space, placing them close enough for their beams to overlap, and confirming the layout on paper before you buy. A practical sequence:
- Define the area that actually needs usable light.
- Establish the mounting height.
- Map the shelves, equipment, walls, beams, and other obstructions.
- Choose a beam angle that fits the height and coverage area.
- Use enough fixtures to create overlap instead of isolated bright spots.
- Confirm the layout with a lighting plan before purchasing.
- Measure the result after installation and fine-tune aiming where needed.
Uniformity is the real target. Designers describe it as a uniformity ratio, comparing the average light level to the minimum (or the maximum to the minimum) across the space. A smooth ratio means no surface drops into shadow; a poor ratio is exactly what people notice as dark bands or dim aisles.
Match the Symptom to the Cause
Before changing anything, identify the type of shadow you are dealing with. Different symptoms point to different causes and fixes.
| What you see | Most likely cause | First things to try |
|---|---|---|
| Dark bands between fixtures | Spacing too wide, or beam too narrow for the mounting height | Tighten spacing, widen the optic, add fixtures, or lower the mount |
| Hard shadows behind racks, machines, or columns | Light arriving from a single direction and being blocked | Add a second direction of light, reposition fixtures, or layer in task lighting |
| Repeating arcs or scallops on walls | Wall washers or spotlights too close to the wall, or the wrong optic | Increase distance from the wall, or switch to a wall-wash distribution |
| A bright hot spot ringed by darkness | Fixture too powerful, beam too tight, or aimed straight down | Use more fixtures at lower output, widen the beam, or raise the mount |

Dark Bands Between Fixtures
Dark bands usually mean the beams are not meeting. It is common down warehouse aisles, corridors, parking rows, and open industrial bays. Closer spacing, a wider distribution, or simply more moderate-output fixtures will close the gaps faster than swapping in higher wattage.
Hard Shadows Behind Objects
Hard shadows form when shelving, machinery, vehicles, people, or columns block direct light, and they can appear even when the overall reading looks high. Because a single fixture lights from one direction, the cure is geometric: bring light in from another angle so nearby luminaires fill the blocked zone.
Wall Scalloping
Scalloping shows up as repeating arcs of bright and dark on a vertical surface. It typically comes from downlights or spots placed too close to a wall, or using a narrow optic where a wash was needed. Pulling fixtures back and choosing an optic designed for wall washing evens the surface out.
Hot Spots With Dark Surroundings
A hot spot is the opposite problem, too much intensity in one place. The floor directly below glows while everything around it falls away. Spreading the same lumens across more fixtures, opening up the beam, or raising the mounting position restores a smoother gradient.
8 Practical Ways to Avoid Shadows With LED Lights
1. Get the Fixture Spacing Right
Spacing is the single biggest lever for uniformity. If fixtures are too far apart, their patterns do not overlap and you get the classic bright-dark-bright rhythm. Useful spacing depends on more than distance, though: it ties together mounting height, beam angle, lumen output, ceiling structure, and the task plane where people actually work. Manufacturers publish a spacing criterion in the fixture's photometric file precisely so you do not have to guess. For overhead fixtures, our notes on how far apart high bay fixtures should sit walk through the trade-offs. Open storage, narrow aisles, and loading docks each need their own spacing approach rather than one uniform grid.
2. Match the Beam Angle to the Space
Beam angle controls how wide or narrow the light spreads. A narrow beam carries well from a high mount or where light must travel far; a wider beam suits lower ceilings and broad coverage. This is where judgment matters: a wider optic is not automatically better. A wide beam from a tall mount can thin out before it reaches the work surface, while a narrow beam over a low ceiling drops bright circles with dark gaps between them. The goal is to fit the optic to the height, spacing, and target, which is exactly what matching the beam angle to the space comes down to.
3. Don't Rely on a Few High-Wattage Fixtures
Cutting fixture count by installing fewer, more powerful lights feels efficient, but it concentrates output. A handful of high-output fixtures tends to scorch the floor directly beneath each one and starve the spaces between. In most commercial rooms, more fixtures at moderate output deliver smoother, more comfortable light. Wattage tells you energy use, not light quality, so it helps to compare fixtures by delivered lumens and distribution rather than wattage.
4. Pair Mounting Height With the Right Distribution
Mounting height sets how far light spreads before it reaches the floor, shelf, bench, or parking surface. Lower mounts leave less room for the beam to widen, so they often call for wider optics, closer spacing, or more fixtures. Higher mounts spread farther but usually need a more controlled distribution to keep useful intensity on the target. A practical guardrail designers use is the spacing-to-mounting-height ratio, the gap between fixtures expressed as a fraction of how high they hang; staying within the fixture's published ratio keeps coverage even. Choose by mounting height and distribution, not by wattage alone.
5. Plan Around Racks, Machinery, Poles, and Walls
Physical obstructions are one of the most common causes of commercial shadows. Pallet racking, tall shelving, production equipment, columns, trusses, ductwork, vehicles, and partitions all block light. A plan drawn for an empty room can fail the moment those go in. A common example: a warehouse adds a row of taller racking after the lights are installed. The original layout assumed open floor, so the new rack tops shade the aisles, and forklift drivers report dim lanes even though the overall floor reading still looks fine. The fix is not more lumens but realigning fixtures over the aisles and adding aisle-optic high bays.
6. Layer Lighting Where One Source Can't Reach
One fixture type rarely solves every shadow. Some spaces need layers: general overhead light for overall visibility, task light for workstations or inspection points, vertical light for shelves, displays, signs, and walls, and accent or safety light for specific zones and exit paths. Layering is most valuable when objects block one direction, because a second angle softens hard shadows and restores visibility on the surfaces people actually look at.
7. Confirm a Photometric Lighting Layout Before You Buy
A photometric layout predicts how the chosen fixtures will perform before they are mounted, modeling fixture locations, mounting heights, beam spread, and the resulting light levels across the room. For commercial and industrial work this is where small layout errors get caught before they turn into expensive rework. A sound plan accounts for the fixture's photometric (IES) file, mounting height, beam angle or optical distribution, spacing, average and minimum light levels, uniformity ratio, task areas, obstructions, surface reflectances, and any code or project requirement. Designers typically build these in tools such as DIALux, AGi32, or Relux, and the targets they design to come from the recommended light levels and uniformity criteria published by the Illuminating Engineering Society (IES). Our overview of a pre-installation lighting layout explains what to provide and what you get back. If the fixture changes after the plan is done, review the plan again, because different optics and output patterns can perform very differently even at similar wattage.

8. Verify the Result After Installation
Even a good design should be checked once it is up. Fixtures can end up slightly off position, aimed incorrectly, or affected by site conditions the plan did not include. Walk the space at the time it is normally used and look for dark bands between fixtures, harsh shadows behind objects, glare from exposed fixtures, bright hot spots, dim corners or pathways, and weak vertical visibility on shelves, signs, or equipment. For larger projects, use a light meter to compare actual readings against the design intent and against code minimums, taking measurements on a grid at the task plane, often around 30 inches above the floor. Workplace rules set a floor for this: the OSHA illumination table, for example, lists 5 foot-candles for indoor warehouses, corridors, and exitways, and calls for lighting positioned to avoid hazardous shadows. If the issue is aiming, many fixtures can be adjusted without replacing the system.
How to Avoid LED Shadows in Different Commercial Spaces
Warehouses and Industrial Facilities
Warehouses are shadow-prone because of high ceilings, tall racking, narrow aisles, forklifts, and storage layouts that change over time. The first principle is to light the aisle, not just the floor between racks: fixtures aligned over the aisle, or aisle-optic and linear high bays, push light down between the racking instead of onto the rack tops. Vertical visibility matters as much as floor brightness here, because workers need to read labels and pick stock on the face of the rack, not only see the slab. LED high bay lights in linear and UFO formats give you the optical choices to do this. And any time rack heights or aisle widths change, revisit the layout, since the geometry that worked on an open floor no longer applies.

Parking Lots and Outdoor Areas
Parking lots need even coverage for safety, visibility, and security. Shadows appear when poles are spaced too far apart, fixtures are aimed poorly, or the optical distribution does not match the lot shape. The key is matching the distribution pattern to the geometry: forward-throw or wide distributions for perimeter poles, more symmetric patterns for interior poles, so light patterns overlap across drive lanes and stalls rather than leaving pockets of darkness at the edges. Keep the uniformity ratio tight while controlling glare, and check the corners, drive lanes, pedestrian routes, and building entrances where coverage tends to fall off. Pole height, lot dimensions, and nearby walls, trees, and signs all feed the spacing decision, and the right LED parking lot and area lighting depends on getting that pole-height-to-distribution relationship right.
Offices, Hallways, and Corridors
Indoors, shadows usually show as alternating bright and dark zones from recessed fixtures, panels, or downlights placed too far apart. Keep spacing consistent, avoid narrow beams under low ceilings, combine ambient light with task light at desks, and make sure work surfaces, not just the floor, receive usable light. Controlling glare from overly bright fixtures keeps the space comfortable for screen work.
Retail Stores and Showrooms
Retail lighting balances product visibility, comfort, and atmosphere, and shadows can make displays look uneven or dull a product's appeal. Layer ceiling light with vertical light for shelves, walls, and displays, and use wall washing where a smooth vertical surface sells the product. Avoid placing spots where shoppers or fixtures cast their own shadow over the display, and always test on real merchandise rather than an empty floor.
Gyms and Sports Facilities
Sports lighting has to suppress shadows while controlling glare, because poor light affects visibility, comfort, and play. Use optics suited to the mounting height, avoid hot spots over specific zones, and pay attention to vertical visibility, which is what lets players track a ball in the air. Multiple fixture positions reduce hard shadows, and the final layout should be confirmed against the actual court, field, or activity area.
Common Mistakes That Make LED Shadows Worse
Choosing by Wattage Alone
Wattage describes energy draw, not light quality. A lower-wattage fixture with the right distribution can outperform a higher-wattage one with the wrong optic, because distribution and uniformity, not raw output, decide how even the result looks.
Ignoring Beam Angle
Beam angle drives coverage. Too narrow and you get bright spots with dark gaps; too wide from a tall mount and you lose intensity or invite glare.
Replacing Fixtures Without Reviewing the Layout
A one-for-one LED swap does not automatically reproduce the old light pattern. Because LEDs are directional, their optics differ markedly from metal halide, fluorescent, or older high bays, and older omnidirectional sources lost much of their light inside the fixture in the first place. The U.S. Department of Energy notes that LEDs emit light in a specific direction, which is why the distribution must be checked rather than assumed. Our guide to retrofitting older fixtures to LED covers what to verify before ordering.
Forgetting About Obstructions
A plan based on an open room can fail in a real facility full of racks, shelving, vehicles, or equipment that block the beam.
Cutting Fixture Count to Save on Installation
Fewer fixtures may lower labor, but it tends to create uneven illumination and raises the odds of rework that costs more than the labor saved.
Skipping the Post-Installation Check
Installation details matter. A fixture mounted in the wrong place or aimed incorrectly can throw shadows even when the product choice was sound.
When Do You Need a Professional Photometric Lighting Plan?
Not every job needs a full layout, but several situations make one worth the effort. Consider a photometric plan when you have high ceilings or tall poles, a large open area where uniformity is hard to judge by eye, a space crowded with racks or machinery, a project that must meet code or insurance lighting requirements, a retrofit replacing HID or fluorescent fixtures with different optics, or a safety- and task-critical area such as a loading dock, inspection bay, or sports surface.
If your project fits any of those, sharing the space dimensions, ceiling or pole heights, and obstruction layout lets a lighting team model the result before you commit, so dark spots and rework are designed out rather than discovered after install.
FAQ
Q: Do LED lights create shadows?
A: They can, when light is blocked or poorly distributed. The cause is almost never the LED technology itself but the layout, beam angle, spacing, mounting height, or obstructions in the space.
Q: What spacing should LED lights have to avoid shadows?
A: There is no single number, because spacing depends on mounting height and beam angle together. A practical guide is the spacing-to-mounting-height ratio published in the fixture's photometric file. Keeping fixture spacing within that ratio so the beams overlap is what prevents dark bands; a wider optic allows wider spacing, a narrow optic needs tighter spacing.
Q: Can brighter LED lights remove shadows?
A: Usually not. Brighter fixtures raise the level directly beneath them but often increase contrast and make the dark areas more obvious. Better spacing, the right beam angle, and good placement are far more effective.
Q: What beam angle is best to avoid shadows?
A: It depends on mounting height, spacing, and the target area. Higher mounts and longer throws favor narrower beams; lower ceilings and broad coverage favor wider beams. The aim is to match the optic to the space, not to default to the widest available.
Q: Why are there dark spots between my LED lights?
A: Dark spots between fixtures usually mean they are spaced too far apart, the beam is too narrow for the height, or there are simply too few fixtures to create overlapping patterns.
Q: How do I check whether my lighting is uniform enough?
A: Use a light meter and take readings on a grid at the task plane, then compare the average to the lowest reading. A large gap between average and minimum signals uneven light; a smooth ratio means no surface is dropping into shadow. Comparing the readings to recommended levels for that space type tells you whether the layout, not just the brightness, is right.
Q: How do you avoid shadows in warehouse lighting?
A: Base the layout on aisle width, rack height, mounting height, spacing, and beam distribution, and align fixtures over the aisles rather than the rack tops. Linear high bays, aisle optics, or carefully spaced UFO high bays improve uniformity, and the plan should be revisited whenever racking or aisle layouts change.
Q: Should I use more lights or brighter lights?
A: For reducing shadows, more fixtures at moderate output usually beat fewer high-output fixtures. The objective is even coverage, not peak brightness in a few places.
Final Thoughts
Shadows are a design problem before they are a product problem. Fixture spacing, beam angle, mounting height, obstructions, and how well the beams overlap decide whether a space looks even or patchy, far more than raw lumens do. The practical takeaway for a commercial upgrade: settle the layout before you order, confirm it with a photometric plan when the space is large, tall, or full of obstructions, and verify the result with a light meter once it is installed. Doing that order of operations is what prevents dark spots, hot spots, harsh shadows, and the costly rework that follows a layout drawn from guesswork. If you are planning a project, our team can model the layout from your dimensions and mounting heights before any fixtures are purchased.