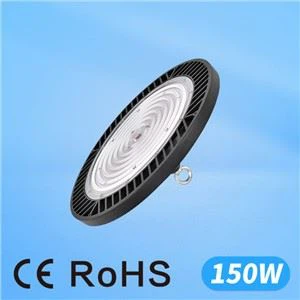
The right warehouse high bay lighting system is not chosen by wattage. It is chosen by the work performed in each area, and then by everything that decides whether light actually reaches that work: the true mounting height, the rack geometry, the optical distribution, uniformity, glare, controls, and the operating environment. Two buildings with identical floor areas can need completely different layouts, because an open bulk-storage shed, a narrow-aisle distribution center, a cold-storage facility, and a packing hall place very different demands on the eye.
Before any products are ordered, a workable plan should answer four questions: how much light each task needs, where that light has to land, which fixture and optic can deliver it efficiently, and how the system should behave when an area is busy, empty, or receiving daylight. The U.S. Department of Energy makes the same point from the purchasing side, recommending that luminaires be selected for the actual application, that over-lighting be avoided, and that controls such as occupancy sensing, task tuning, and dimming be considered as part of the specification (DOE FEMP luminaire purchasing guidance). Target light levels themselves should be confirmed against a recognized standard and local requirements rather than a generic online table.

What Makes a Good Warehouse Lighting Plan?
A good plan delivers the required horizontal and vertical illumination, with acceptable uniformity, without excessive glare, dark zones, or wasted electrical load. It is built from the work in each zone, the actual mounting height, the rack height and aisle width, the fixture's real photometric distribution, and the average, minimum, and maximum levels it produces on the working plane, plus the driver, controls, and environmental ratings the site demands.
The single most common mistake is to size a fixture by swapping a legacy wattage for a lower LED wattage. A proposed fixture has to be judged by the light it puts on the working area, not by its input power or its advertised lumen output. The table below is the short version of the inputs a designer needs before a layout is even possible.
Design Inputs at a Glance
| Input | Why it matters | Where it comes from |
|---|---|---|
| Task in each zone | Sets target levels and where light must land | Site walk-through and operations |
| Mounting height (not ceiling height) | Drives optic choice, spacing, and output | Field measurement to the working plane |
| Rack height and aisle width | Determines vertical needs and shadowing | Rack drawings or measurement |
| Target horizontal and vertical levels | Defines the pass/fail criteria | Applicable standard and client spec |
| Photometric file for the exact SKU | Makes a reliable prediction possible | Manufacturer IES/LDT file |
| Ambient temperature and exposure | Governs fixture, driver, and rating choice | Environmental survey |
| Control zones | Enables savings without dark aisles | Operations and layout |
Step 1: Define the Task in Each Warehouse Zone
A warehouse rarely needs one uniform specification wall to wall, so the first move is to divide the building into functional zones and light each for what actually happens there.
Open storage and bulk areas mainly need even horizontal coverage and safe visibility at intersections, with controlled contrast and minimal glare for forklift operators. Wide-distribution fixtures often suit these areas, but only if the beam matches the mounting height and spacing; a wide beam hung too high wastes light on upper surfaces, while a narrow beam hung too low leaves bright circles and dark gaps between them.
Rack aisles are the zone most designs get wrong. Workers there have to read labels, carton markings, and shelf edges on vertical surfaces, so a layout can meet its average floor foot-candles and still fail on the rack face. Aisle designs should be judged on vertical illumination and on the minimum level in the aisle, not on the horizontal average alone, and they have to account for the shadows thrown by merchandise and structure.
Receiving, staging, and shipping combine vehicle movement, document and pallet checks, and abrupt changes in activity, so they usually justify higher task visibility, good color recognition, strong uniformity around dock doors, and independent control of docks or lanes. Packing, inspection, repair, and maintenance involve finer detail; rather than over-lighting the whole building for a handful of detailed stations, treat those as separate zones with lower-mounted or localized task lighting and suitable color rendering.
How Should Warehouse Foot-Candle Targets Be Set?
There is no single foot-candle number that fits every warehouse. The right target depends on the size and contrast of what is being viewed, the speed and accuracy required, whether the task is horizontal or vertical, background reflectance, and worker and safety factors. One foot-candle is about 10.76 lux, but converting units does not answer the more important questions: on which plane the value is measured and which task it represents.
The tiers below are typical starting ranges, not a code and not a substitute for a proper standard. In North America, industrial illuminance recommendations live in ANSI/IES RP-7-21+E1 and the IES Interactive Illuminance Selector, which let a designer pick task-based levels by application. Confirm your numbers there and against local requirements.
| Area / task | Typical horizontal target (fc) | Vertical illumination priority |
|---|---|---|
| Bulk / open storage | ~10–20 | Low to moderate |
| Rack aisles / active picking | ~20–30 | High (rack face) |
| Packing / staging / shipping | ~30–50 | Moderate |
| Inspection / QC | ~50+ | High, task-specific |
Whatever target you document, record the measurement plane, the average, the acceptable minimum, the required uniformity, any vertical requirement, and whether the value is initial or maintained. A number without those qualifiers cannot be verified after installation.
Step 2: Measure Mounting Height and Warehouse Geometry
Ceiling height and mounting height are frequently not the same. A building can have a high roof while fixtures hang below beams, mechanical services, conveyors, or trusses, and the dimension that matters for design is the distance from the luminaire to the working plane. Before requesting a layout, capture the building footprint and clear height, the proposed mounting and work-plane heights, rack locations and dimensions, aisle and cross-aisle widths, columns and other obstructions, dock doors and skylights, and existing circuits and mounting points.
As mounting height rises, a fixture has to carry useful light over a longer throw, so distribution, spacing, output, and aiming all shift. A high-output fixture with the wrong beam still produces hotspots below it, dark bands between fixtures, glare, light spilling onto rack tops instead of into the aisle, or weak vertical illumination. This is exactly why square-foot rules and simple spacing ratios belong to early budgeting only. For a first-pass sense of layout and count they are useful, and our guide to spacing high bay lights walks through how spacing interacts with height, but the final spacing has to come from the fixture's own photometric data.
Step 3: Choose the Fixture and Optical Distribution
UFO and linear are the two common formats, but shape is the wrong place to start a decision. A round UFO can be fitted with a narrow, medium, or wide distribution; a linear body can carry a broad-area optic or a dedicated aisle optic. So the real comparison is not UFO versus linear at all, but candela distribution, delivered horizontal and vertical illumination, glare performance, spacing and uniformity, mounting fit, and environmental ratings. The best fixture is the one that meets the lighting and operating requirements with the least unnecessary power and the fewest compromises.
With that caveat, the format still carries practical tendencies, summarized below. For a deeper walk-through, see our UFO vs linear high bay comparison.
| Consideration | UFO high bay | Linear high bay |
|---|---|---|
| Typical footprint | Compact, round; hook or pendant mount | Elongated body; may need more mounting space |
| Common best fit | Open areas, bulk storage, high clear ceilings, point-source replacement | Long aisles, picking zones, rectangular areas, fluorescent replacement |
| Narrow-aisle suitability | Depends on optic; circular beams can miss aisles | Strong with a proper aisle optic |
| Main watch-out | Hotspots if spacing is too wide | Poor result if a wide optic is used over narrow aisles |
Step 4: Build a Photometric Layout
A photometric layout predicts how a specific luminaire will perform in a specific space, and it should be run before ordering for any large area, complex rack layout, high ceiling, or project where fixing a bad result later would be expensive. The designer needs accurate plan dimensions, mounting height, rack and aisle geometry, working-plane height, surface reflectances where known, target levels including any vertical requirement, the proposed luminaire model with its photometric data and input power, lumen-maintenance assumptions, obstructions, and the intended control zones. Our note on why a pre-installation lighting layout matters covers how this feeds procurement.
Reviewing the output is where judgment lives, and a colored rendering is not enough - the numbers are. In practice we review a layout against a short table like the one below, because a design with a healthy average can still be poor if the minimum is too low or the maximum too high.
| Metric | Design target | Simulated result | Pass? |
|---|---|---|---|
| Average horizontal (fc) | - | - | - |
| Minimum (fc) | - | - | - |
| Average-to-minimum uniformity | - | - | - |
| Maximum-to-minimum ratio | - | - | - |
| Vertical illumination, rack face (fc) | - | - | - |
| Connected load (kW) | - | - | - |
One detail is easy to overlook and costly to get wrong: the photometric file has to match the exact fixture family, wattage or output setting, lens, reflector, beam angle, CCT option, and mounting configuration. Borrowing data from a similar-looking product produces a confident but misleading prediction. The relevant test methods are ANSI/IES LM-79 (electrical and photometric measurement) and ANSI/IES LM-63 (the photometric data file format); asking for both, tied to the specific SKU, is a reasonable request of any supplier.
Step 5: Check Light Quality, Not Just Brightness
Quality decides visibility, comfort, and accuracy as much as raw output does. On color temperature, many industrial projects land on 4000K or 5000K, but neither is automatically correct; the choice should follow the visual tasks, existing sources, indoor–outdoor transitions, product colors, and any client standard. A higher CCT looks cooler but does not by itself create more usable light - delivered lumens, distribution, surface reflectance, and visual adaptation still govern that.
Color rendering deserves a task-based answer rather than a blanket rule. CRI 80 is a common reference point for general interior work, but the appropriate value depends on the task and the market, not on a single universal minimum. For ordinary storage, very high CRI adds little; for wire identification, quality inspection, color-coded products, printing, textiles, or food handling, color performance is worth specifying deliberately.
Glare tends to appear when high-output fixtures have small luminous surfaces, sit too low, use narrow optics that create intense hotspots, or line up with a worker's view down an aisle, and it is made worse by reflective floors or packaging. The remedy is to review luminance, shielding, lens design, mounting position, distribution, and spacing - not to keep adding wattage, which usually raises glare and energy use without curing the underlying layout. Flicker and dimming behavior belong in the same review: ask for the driver's operating range, minimum dimming level, dimming and sensor compatibility, and flicker performance, referenced where possible to ANSI/IES LM-90, since an efficient fixture can still behave badly under control.
Step 6: Add Lighting Controls by Zone
LED luminaires pair well with occupancy sensing, dimming, task tuning, and daylight-responsive control, and the DOE identifies these as real opportunities for additional savings. The value comes from zoning. Rather than switching a whole building at once, control individual aisles or small groups of fixtures, coordinate across aisles, and prefer reduced background levels to complete darkness, with detection tuned to the actual movement in the space - forklift travel, walking, and stationary work have different sensing needs. Many dimmable systems can also be commissioned below full output while still hitting target levels, which trims connected demand and leaves headroom for later changes. Our overview of high bay lights with motion sensors covers where this pays off first.
Controls only save energy if they are commissioned. Installing sensors is not the same as configuring them, and incorrect settings cause nuisance switching, lights stuck at full output, or unsafe dark zones. Commissioning should verify detection coverage, timeout and daylight thresholds, dimming response, override and emergency behavior, and the interaction between zones. ANSI/IES LP-8 is the recognized reference for commissioning lighting and control systems and is a fair thing to hold a controls vendor to.
Step 7: Match the Fixture to the Environment
Warehouse conditions vary far more than a standard dry-indoor spec assumes, so the whole assembly - housing, driver, seals, cables, and sensors - has to suit the environment, not just the LED. Temperature comes first: cold storage, freezers, hot roof spaces, and areas near process equipment all demand a confirmed operating range for the complete fixture and its driver, since a driver or sensor often has a narrower window than the LED source. LED technology performs well in cold and switches instantly, but only if every component is rated for it.
Ingress and impact follow from a real survey of dust, humidity, washdown, condensation, and dock exposure, matched to an appropriate IP rating, and from the impact risks of forklift masts, cranes, rack work, or vibration, matched to an IK rating, lens material, and secure mounting. Choosing a rating without understanding the actual exposure is guesswork; our primer on IP protection classes and IP codes explains what each digit covers. Corrosive settings - food processing, chemicals, coastal air, fertilizer, washdown - may additionally need special housings, coatings, fasteners, or lenses.
Hazardous locations are a separate category and a legal one. A standard high bay is not automatically suitable for an area with combustible gases, vapors, dusts, or fibers; those areas require a formal classification and correctly certified equipment (for example under NEC/NFPA 70, IECEx, or ATEX, depending on the market). A high IP or IK rating is not a substitute for that approval. Our resource on LED explosion-proof lighting for hazardous areas outlines the certification basics.
Retrofit Energy and Cost Calculation
A quick energy comparison is useful for scoping, using annual energy = fixture quantity × input watts ÷ 1,000 × annual hours × operating factor, where the operating factor reflects the share of full-output runtime left after scheduling, occupancy control, or dimming.
As an illustration only, a building with 120 existing 400 W fixtures running 3,000 hours a year uses 144,000 kWh (120 × 400 ÷ 1,000 × 3,000). A proposed design of 120 LED fixtures at 160 W over the same hours uses 57,600 kWh, a difference of 86,400 kWh before controls. This does not prove that a 160 W LED replaces every 400 W legacy fixture; the LED still has to meet the required levels, distribution, uniformity, environment, and electrical conditions. To reach a financial figure, multiply the kWh difference by the applicable rate, subtract control-system consumption, and account for demand charges, installation labor, lift rental, rewiring, disposal, rebates, and warranty. When you get to product selection, our LED high bay light range lists the input wattages and output options needed to run this comparison against real fixtures.
A Field Example: When the Average Passes and the Minimum Fails
The following is a representative narrow-aisle review that reflects the kind of result our application team sees regularly; parameters are anonymized and rounded. A distribution center with roughly 9 m clear height and fixtures mounted near 8.5 m had a proposed layout using a wide-distribution UFO on a grid sized for open floor. The rendering looked bright, and the average floor illuminance came out around 27 fc, comfortably inside the target for active picking.
The problem showed on the vertical planes. With the racks in place, the wide beam threw much of its output onto rack tops and aisle floors, and the measured minimum on the lower rack faces fell below 8 fc - dark enough that operators struggled to read labels on bottom shelves late in a shift. Swapping to an aisle-optimized distribution aimed down the aisles, at the same connected load, raised the vertical minimum on the rack face and tightened the average-to-minimum uniformity, without adding fixtures or wattage. The lesson is the recurring one: judge the aisle on its vertical minimum, not the floor average, and let the optic - not the wattage - fix the shortfall.

Warehouse High Bay Buying Checklist
Before approving a fixture, request the optical evidence (delivered lumens, luminaire efficacy, the photometric file for the exact SKU, the selected optic and candela distribution, glare-control features, CCT, color data, and lumen-maintenance documentation); the electrical detail (actual input wattage, voltage, power factor, driver specification, surge protection, dimming method, and control and emergency-driver compatibility); and the mechanical and environmental data (housing and lens materials, mounting and safety-cable provisions, ambient-temperature range, IP and, where relevant, IK ratings, corrosion and vibration suitability, and installed weight). On the commercial side, confirm the required safety listing, any energy-program qualification, test documentation, warranty terms and exclusions, replacement and spare-parts arrangements, lead time, and change-notification practice.
Not every line carries equal weight, so it helps to separate what must be present from what depends on the project.
| Parameter | Priority |
|---|---|
| Photometric file matching the exact SKU (LM-79 / LM-63) | Must-have |
| Delivered lumens, efficacy, and actual input wattage | Must-have |
| Safety listing (e.g., UL / ETL) | Must-have |
| Driver specification and dimming method | Must-have |
| Lumen-maintenance report (L70 with TM-21 projection) | Must-have |
| Ambient-temperature range | Must-have for cold/hot sites |
| Hazardous-location certification | Must-have where the area is classified |
| IP rating | Project-dependent on exposure |
| IK rating | Project-dependent on impact risk |
Efficiency thresholds and program requirements change over time, so verify current rules for your market and compare efficacy only between products intended for similar applications and distributions - the DOE specifically warns that comparing unlike luminaires on efficacy alone leads to the wrong choice. On lumen maintenance, ask for the underlying LM-80 test data and the TM-21 projection behind any stated life figure, rather than accepting a bare L70 number.
Common Warehouse Lighting Mistakes
Most avoidable failures trace back to a handful of habits. Sizing by wattage ignores that LED watts do not define delivered light. Using one fixture everywhere ignores that storage, aisles, packing, docks, and maintenance need different optics or levels. Confusing ceiling height with mounting height distorts the whole calculation. Reading only floor-level averages hides whether labels on rack faces are legible and whether a low minimum is lurking under a healthy average. Assuming UFO always means "open area" ignores that some UFOs are narrow and some linears are broad - the photometric data settles it, not the shape. Adding output to rescue a bad layout usually adds glare and cost instead of fixing spacing. Skipping commissioning quietly erases the savings controls were supposed to deliver. And accepting a generic "400 W replacement" claim treats a starting point as if it were design verification.
FAQ
Q: How many LED high bay lights does a warehouse need?
A: It depends on the dimensions, mounting height, rack layout, target illumination, fixture distribution, surface reflectance, and required uniformity, so a fixture-per-square-foot rule cannot replace a photometric layout. Our guide on how many LED high bay lights a warehouse needs shows how these variables interact.
Q: How far apart should warehouse high bay lights be?
A: Spacing follows mounting height and the selected optic. Wider spacing lowers fixture count but risks low minimums and poor uniformity, so verify it against the fixture's photometric data rather than a fixed ratio.
Q: Are UFO or linear high bays better for warehouses?
A: Neither is universally better. UFOs often suit open areas and point-for-point replacements; linears often suit aisles, rectangular zones, and fluorescent replacement. The chosen optic and the photometric result matter more than the housing shape.
Q: Is 4000K or 5000K better for a warehouse?
A: Both are used successfully. Choose by visual task, existing lighting, worker comfort, client standards, and color-recognition needs. A higher CCT does not create more usable light on its own.
Q: Can a 150 W LED replace a 400 W metal halide?
A: Sometimes, but not by default. Confirm the existing fixture's real performance, the proposed LED output and beam, mounting height, target foot-candles, and uniformity through a layout before assuming equivalence.
Q: Should warehouse high bays use motion sensors?
A: Occupancy sensing is valuable in intermittently used aisles and storage zones, provided the sensing technology, coverage, timeout, background level, and zoning are matched to how the space is worked.
Q: What information is needed for a photometric layout?
A: A floor plan and dimensions, mounting height, rack layout and aisle width, work-plane height, target levels, surface conditions, obstructions, proposed control zones, and any client or code requirements.
Q: How can warehouse lighting glare be reduced?
A: Review fixture luminance, shielding, lens design, mounting height, beam angle, spacing, and alignment, and cap maximum levels - not only lower the CCT or drop wattage.