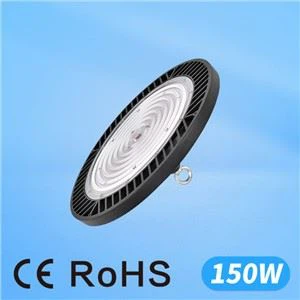

LED lights are made by turning semiconductor wafers into tiny light-emitting chips, packaging those chips so they produce usable light, mounting them onto a circuit board, and then assembling that board with a driver, heat sink, optics, and housing into a finished lamp or fixture. In short, an LED light begins as a semiconductor device and becomes a lighting product through precision chip fabrication, electronic assembly, and quality testing.
That sounds simple, but the gap between a working chip and a reliable fixture is where most of the real engineering lives. Understanding how an LED light is built explains why two products with the same wattage and color temperature can behave very differently once they are installed in a warehouse, a parking lot, or a wet processing area.
This guide reflects how LED luminaires are designed, built, and tested in practice, drawing on application and manufacturing experience with industrial and commercial fixtures. Where a claim depends on a standard or a measurement method, the relevant authority is linked rather than left as an assertion.
How Are LED Lights Made?
An LED light is not produced in a single step. It moves through several distinct manufacturing stages:
- Engineers define the target brightness, color temperature, efficacy, beam angle, and operating environment.
- Semiconductor wafers are grown and processed into LED chips (the LED chip manufacturing stage).
- The chips are packaged with electrical contacts, protective encapsulation, optics, and usually phosphor for white light.
- Packaged LEDs are soldered onto a printed circuit board to form an LED module.
- A driver, heat sink, lens or reflector, and housing are added to create the finished lamp or fixture (the LED light assembly stage).
- The finished product is tested for electrical safety, light output, color, thermal behavior, and reliability before shipment.
The chip produces the light, but the finished product is only as good as the weakest part of the system. A premium chip can still underperform if the driver, thermal path, or housing is poorly engineered for the application.
LED Chip vs LED Package vs LED Module vs LED Fixture
These four terms are often used interchangeably, yet they describe different levels of the same product. Getting the hierarchy straight makes the rest of the manufacturing process far easier to follow.
| Level | What it is | What it adds |
|---|---|---|
| LED chip (die) | The bare semiconductor crystal that emits light at a P-N junction | The light source itself; sets wavelength and base efficiency |
| LED package | A single chip mounted, bonded, encapsulated, and usually coated with phosphor | Protection, electrical connection, a first thermal path, and white-light conversion |
| LED module | One or more packaged LEDs arranged on a printed circuit board | Current distribution, board-level heat spreading, and light uniformity |
| LED fixture (luminaire) | A module combined with a driver, heat sink, optics, and housing | Power regulation, thermal management, beam control, and environmental protection |

What Is an LED Light Made Of?
A finished LED light contains far more than a glowing diode. The major components are the LED chip, the LED package, the PCB or module, the driver, the heat sink, the optics, and the housing.
LED Chip
The LED chip is the core light-producing component, made from semiconductor materials that allow current to flow in a controlled way. When electrons and holes recombine at the semiconductor junction, the released energy is emitted as light. Different materials and layer structures produce different wavelengths, which is why LED manufacturing has more in common with semiconductor fabrication than with traditional bulb making. If you want the physics behind that step, our explainer on how an LED converts electricity into light covers it in more depth.
LED Package
The package protects the chip and makes it usable in an electrical system. It typically includes the die, electrical contacts, bond wires or other interconnects, a substrate or lead frame, encapsulation material, an optical surface, and phosphor where white light is needed. The package is also the first stage of the thermal path, drawing heat away from the junction, because excess heat reduces output, shifts color, and shortens service life. Packaging format matters here too: surface-mount (SMD) and chip-on-board (COB) constructions distribute heat and light differently, a distinction explained in our comparison of COB and SMD LED designs.
PCB or LED Module
Packaged LEDs are mounted onto a printed circuit board, often grouped into a module. The PCB carries current to the array and frequently doubles as a heat spreader. In higher-power products, the board material (for example, metal-core PCB) and the layout are integral parts of the thermal design, not afterthoughts.
LED Driver
LEDs need a tightly controlled electrical supply. The driver converts incoming mains power into the correct current and voltage for the LED system. A weak or mismatched driver is one of the most common causes of visible flicker, audible noise, unstable output, and early failure, which is why driver quality is often as decisive as chip quality in commercial and industrial fixtures. For a closer look at how to read and match one, see our guide to what an LED driver does and how to choose it.
Heat Sink, Optics, and Housing
The heat sink, usually aluminum, carries heat away from the module; in demanding fixtures the design of that heat sink and thermal interface directly limits how hard the LEDs can be driven. Optics (lenses, reflectors, diffusers) shape and aim the light, and the housing supports installation while protecting the internals. For outdoor, industrial, or wet-location use, the housing also has to resist dust, moisture, impact, and corrosion.
The LED Manufacturing Process, Step by Step
The exact LED light production process varies by product type, but most fixtures follow the same path from semiconductor wafer to finished luminaire.

Step 1: Define the Lighting Requirements
Before anything is built, engineers fix the performance targets: lumen output, wattage and efficacy, color temperature and color rendering, beam angle or distribution, dimming compatibility, input voltage, operating temperature range, the environment (indoor, outdoor, wet, or hazardous location), expected service life, and the safety approvals the target market demands. This stage governs everything downstream. A high-bay fixture running 12 to 16 hours a day in a hot warehouse needs a very different thermal and optical design than a decorative bulb, and a coastal parking-lot fixture needs far more environmental protection than an office panel.
Step 2: LED Wafer Growth and Chip Fabrication
Chip manufacturing begins with a semiconductor wafer, a thin slice of crystalline material that serves as the base for thousands of tiny chips. Semiconductor layers are grown with precise control over composition and thickness, because those layers determine how the LED conducts current and what color it can emit. Cleanliness is critical: small contamination problems show up later as reduced yield, weaker output, and poorer long-term reliability.
Step 3: Forming the P-N Junction
An LED works because of a P-N junction, where two differently doped semiconductor regions meet. The N-type side carries extra electrons and the P-type side carries holes. When current flows, electrons and holes recombine at the junction and release energy as photons. The material system and junction design set the wavelength, efficiency, and electrical behavior of the device.
Step 4: Adding Metal Contacts and Wafer Processing
Manufacturers then build electrical contact patterns on the wafer through processes such as deposition, photolithography, etching, and surface treatment. The aim is accurate, low-resistance current paths that do not block more light than necessary. Wafers are tested during or after processing to find defects and check electrical performance before the wafer is cut.
Step 5: Dicing and Sorting the Chips
The processed wafer is divided into individual chips (dies) by precision cutting, scribing, or laser separation. Chips are then inspected and sorted, and those outside the required electrical or optical limits are removed before packaging. This is also where binning begins: grouping chips by brightness and color so that finished fixtures stay consistent.
Step 6: LED Packaging - Phosphor, Encapsulation, and Thermal Path
Each chip is mounted into a package using die attach, wire bonding, or similar interconnection, then sealed with encapsulation that also helps shape the light. For most white LEDs, a phosphor layer is applied in or around the package: the chip emits blue (or near-ultraviolet) light, and the phosphor converts part of it to longer wavelengths so the combined output reads as white to the eye. Packaging is one of the most influential stages for light quality, thermal performance, and reliability, and it is where binning tolerance and phosphor consistency largely decide whether a batch holds its color.
Step 7: Mounting LEDs onto the PCB
Packaged LEDs are placed onto the circuit board, typically by automated surface-mount assembly and reflow soldering. The board layout sets how current is distributed across the array and strongly affects thermal performance, serviceability, and optical uniformity. A well-designed module spreads the LEDs to deliver the intended distribution while keeping junction temperatures in check.
Step 8: Adding the Driver, Heat Sink, Optics, and Housing
The module is then integrated into the final product. The driver is added to regulate power, the heat sink is bonded to the module (often with a thermal interface material) to move heat out, lenses or reflectors are fitted to control the beam, and the housing is assembled for structure and protection. At this point the product becomes a complete LED light rather than a loose component.
Step 9: Test, Burn-In, and Final Sorting
Quality testing closes the process. Depending on the product and application it can include electrical safety testing, light-output and color-temperature measurement, color-rendering checks, driver performance and dimming tests, thermal testing, ingress (waterproof and dustproof) testing, burn-in or aging, and final visual inspection. The aim is to confirm the fixture performs safely and consistently across its rated operating conditions.
How White LED Light Is Created
LED chips do not naturally emit broad-spectrum white light the way the sun or an incandescent filament does. According to the U.S. Department of Energy, white light is produced in one of three ways: phosphor conversion, in which a phosphor coating converts part of a blue LED's output into other wavelengths; color mixing, in which separate red, green, and blue emitters are combined; or a hybrid approach that uses both. Phosphor conversion dominates general lighting, while color mixing suits color-changing and architectural systems. The method chosen affects color quality, efficiency, consistency, and cost.
LED Chip Manufacturing vs LED Light Assembly
One of the most useful things a buyer can understand is that "making the chip" and "making the fixture" are different industries operating at different scales, and they are frequently done by different companies.
| Aspect | LED chip manufacturing | LED light assembly |
|---|---|---|
| Core activity | Semiconductor wafer growth, junction formation, dicing, packaging | PCB assembly, driver integration, thermal and optical design, housing |
| Environment | Cleanroom semiconductor fabrication | Electronics and mechanical assembly lines |
| Quality levers | Material purity, binning, phosphor consistency | Driver matching, thermal path, soldering quality, sealing |
| Typical maker | Specialist semiconductor and packaging firms | Luminaire manufacturers |
This is why a fixture branded with a well-known chip can still disappoint: the chip is only one input, and the finished product also depends on electrical, thermal, optical, and mechanical work done at the assembly stage.
What Makes a High-Quality LED Light?
LED quality is a system property. Real-world performance depends on how well the chip, package, driver, thermal design, and housing work together over time, not on any single headline number.
Efficiency That Survives the Real World
Good manufacturing produces consistent lumen output with little wasted energy, but driver losses, optical losses, and heat buildup all erode the efficacy a chip can deliver on paper. The figure that matters is delivered efficacy in the actual fixture and environment.
Color Consistency and Color Shift
Two lights can share a nominal color temperature and still look different, because manufacturing variation, phosphor quality, and binning control all influence consistency. Tight binning is usually expressed as a CCT tolerance or in MacAdam ellipse "steps," and looser binning becomes obvious when many fixtures share one space. Color shift over the life of the product is a separate concern from initial color, and both come back to package quality. A high color rendering index (CRI) matters most in retail, healthcare, food processing, and architectural spaces where accurate color is part of the job.
Heat Management and Lumen Depreciation
Heat is the main driver of LED aging. LEDs are efficient, but they still generate heat at the junction and in the electronics, and that heat governs how quickly output declines. Independent lumen-maintenance data is gathered using the IES LM-80 method, which typically runs LED packages for 6,000 to 10,000 hours, while the companion TM-21 method projects longer-term output from that data and caps projections at six times the test duration. The same authority notes that those projections describe the LED components, not the whole luminaire, so lumen-maintenance figures should never be read as a fixture warranty. A well-designed heat sink, thermal path, and housing keep the LEDs within their intended operating range and slow lumen depreciation.
Driver Reliability and Flicker Risk
The driver decides how cleanly power reaches the LEDs. A reliable driver holds output stable and limits flicker, noise, and early failure. As ENERGY STAR describes, the heat an LED generates is absorbed by a heat sink, and rather than burning out abruptly LEDs tend to fade gradually, which means a marginal driver or poor cooling shows up as creeping degradation rather than a single obvious fault. In demanding settings the driver should be matched to the voltage, ambient temperature, dimming protocol, and duty cycle.
Safety and Environmental Protection
Outdoor and industrial fixtures may need protection from moisture, dust, vibration, corrosion, or temperature extremes, and the housing, seals, cable entries, and materials all affect durability. For commercial projects, safety approvals and application-specific ratings should be checked before purchase rather than assumed.
| Feature | Well-made LED light | Low-quality LED light |
|---|---|---|
| Driver | Matched, surge-protected, low flicker | Generic, undersized, prone to flicker and early failure |
| Thermal design | Engineered heat sink and thermal path | Thin or decorative heat sink; high junction temperature |
| Color | Tight binning, stable color over life | Loose binning, visible color shift between units |
| Housing | Rated for the environment, properly sealed | Unrated, poor sealing, corrosion risk |
| Evidence | Test data, certifications, realistic life claims | Marketing claims with little verifiable data |
How Manufacturers Test LED Lights Before Shipment
Testing is where manufacturing quality is either confirmed or exposed. A typical program for a commercial or industrial fixture covers several layers:

- Electrical safety: insulation, grounding, and dielectric checks to confirm the product is safe to power.
- Photometric measurement: integrating-sphere testing for total lumen output and efficacy, plus goniophotometer work for beam distribution.
- Color performance: verification of color temperature, color rendering, and binning consistency across a batch.
- Driver and dimming: output stability, flicker, and behavior across the rated voltage and dimming range.
- Thermal testing: junction and housing temperatures under rated load, often at elevated ambient temperatures.
- Ingress protection: water and dust tests appropriate to the product's IP rating.
- Burn-in and aging: running fixtures for an extended period to catch early failures (infant mortality) before they reach the field.
Common failure modes that good testing is designed to catch include driver capacitor aging, solder-joint fatigue, lumen depreciation from poor cooling, and color shift from phosphor or binning problems.
Common Mistakes When Comparing LED Lights
Judging by Wattage Alone
Wattage measures how much power a fixture draws, not how much useful light it delivers. Comparing lumens, efficacy, beam angle, and application performance is far more meaningful, which is why it pays to compare lumens rather than watts when selecting fixtures.
Ignoring the Driver
A strong chip cannot compensate for a weak driver. Poor driver quality is a frequent root cause of flicker, unstable output, and short service life, yet it rarely appears in a quick spec comparison.
Assuming All White LEDs Look the Same
Color temperature alone does not tell the full story. Color rendering and color consistency matter just as much, especially across many fixtures in retail, office, healthcare, food processing, or architectural spaces.
Overlooking Heat
If a fixture cannot manage heat, both output and lifespan suffer. Thermal design is especially critical for high-output commercial and industrial products that run for long hours.
Buying on Lowest Price Without Checking Quality
Budget fixtures can be fine for simple, low-stakes applications. Critical spaces justify more attention to driver quality, thermal design, optics, housing protection, and test evidence, because a single warranty claim or unplanned replacement often costs more than the initial saving.
Are All LED Lights Made the Same Way?
No. The same core process underlies most products, but the engineering scales sharply with the application. LED bulbs and strips are relatively simple, while LED panels, high-bay fixtures, street and flood lights, and hazardous-location fixtures add far more thermal, optical, and mechanical complexity. Packaging style also varies: SMD packages are common across general lighting, COB is used where a dense, uniform source is needed, and high-power single-emitter packages suit narrow, long-throw optics. The further a fixture sits toward high output and harsh environments, the more the driver, thermal path, and housing separate good products from poor ones.
FAQ
Q: How are LED lights made step by step?
A: Requirements are defined, wafers are grown and processed into chips, chips are packaged with phosphor for white light, packaged LEDs are soldered onto a PCB, and the module is assembled with a driver, heat sink, optics, and housing before final testing and burn-in.
Q: What materials are used to make LED lights?
A: Semiconductor materials for the chip, phosphor for white-light conversion, a substrate or lead frame and bond wires in the package, a printed circuit board (often metal-core for power fixtures), electronic components in the driver, aluminum for the heat sink, polymer or glass optics, and metal or polymer for the housing.
Q: How is white light produced in LEDs?
A: Most commonly through phosphor conversion: a blue chip emits blue light and a phosphor layer converts part of it to longer wavelengths so the combined output appears white. Color mixing of red, green, and blue emitters and hybrid approaches are also used.
Q: What is the difference between an LED chip and an LED fixture?
A: The chip is the bare semiconductor that emits light. The fixture is the complete product, combining a packaged chip (or many) on a board with a driver, heat sink, optics, and housing. A fixture's reliability depends on the whole system, not the chip alone.
Q: Why does LED driver quality matter?
A: The driver controls the current and voltage reaching the LEDs. A poor driver can cause flicker, audible noise, unstable output, and early failure, so for commercial and industrial fixtures driver quality is often as important as chip quality.
Q: What is binning in LED manufacturing?
A: Binning is sorting LED chips and packages by brightness and color so that finished fixtures stay consistent. Tighter binning tolerance, often described in CCT steps or MacAdam ellipses, reduces visible differences between units in the same installation.
Q: How are LED lights tested before shipping?
A: Through electrical safety testing, integrating-sphere and goniophotometer measurement of output and distribution, color and driver checks, thermal testing, ingress (water and dust) testing, and burn-in or aging to catch early failures before products reach the field.
Q: Why do some LED lights fail early?
A: Usually because of heat and electronics rather than the chip. Common causes include inadequate cooling, an undersized or mismatched driver, capacitor aging, solder-joint fatigue, and housings that are not rated for the environment.
Conclusion: LED Lights Are Precision Electronic Products
LED lights are made through a combination of semiconductor manufacturing, precision packaging, electronic assembly, and final testing. The process starts with a tiny chip, but the finished light depends just as much on the driver, PCB, heat sink, optics, and housing, and on the test work that confirms they perform together.
For buyers, the takeaway is straightforward: do not judge an LED light by wattage or price alone. Look at the full system. A well-made fixture pairs efficient chips with stable power, strong thermal management, suitable optics, and reliable protection for its intended environment, and it backs realistic performance claims with test data and appropriate certifications.